Seamless setup for Admins, Residents & Guards
This step-by-step guide walks you through the complete setup process — from apartment registration and resident onboarding, to guard app installation and daily operations.
Signup and Create Your Apartment Complex
Step 1: Begin with Your Phone Number
After entering your phone number, tap Create Apartment to begin setting up your apartment complex.
Step 2: Access Profile Settings Anytime
Already part of a different apartment complex? You can create a new one anytime by navigating to your Profile Settings and tapping the Create New Apartment button.
Step 3: Add Apartment Details
Enter your apartment complex details. Then add your block and flat/house number, to add yourself as a verified resident within the apartment complex.
Easily Onboard Residents to Your Community
Step 1: Share Joining Code
Click on Invite Residents to share the joining code with residents via Whatsapp or any messaging app.
Step 2: Control Access Flexibly
You can choose to auto-approve residents or review each join request manually. You can also limit how long the auto-approval remains valid (e.g., 1 day, 1 week, or 1 month).
Step 3: Manage Resident List
Once sent, manage your residents by clicking on the Your Neighbors button.
Manage Security by Adding Guards
Register Guards Easily
Add guards to your apartment complex by clicking on Add Guards and enter their details. These guards will login to the SmartGuard Guard app using the phone number you've added here to check in visitors, scan passes and make entires.
Monitor and Manage Guard Activity
Once added, manage your guards by clicking on the Guards button.
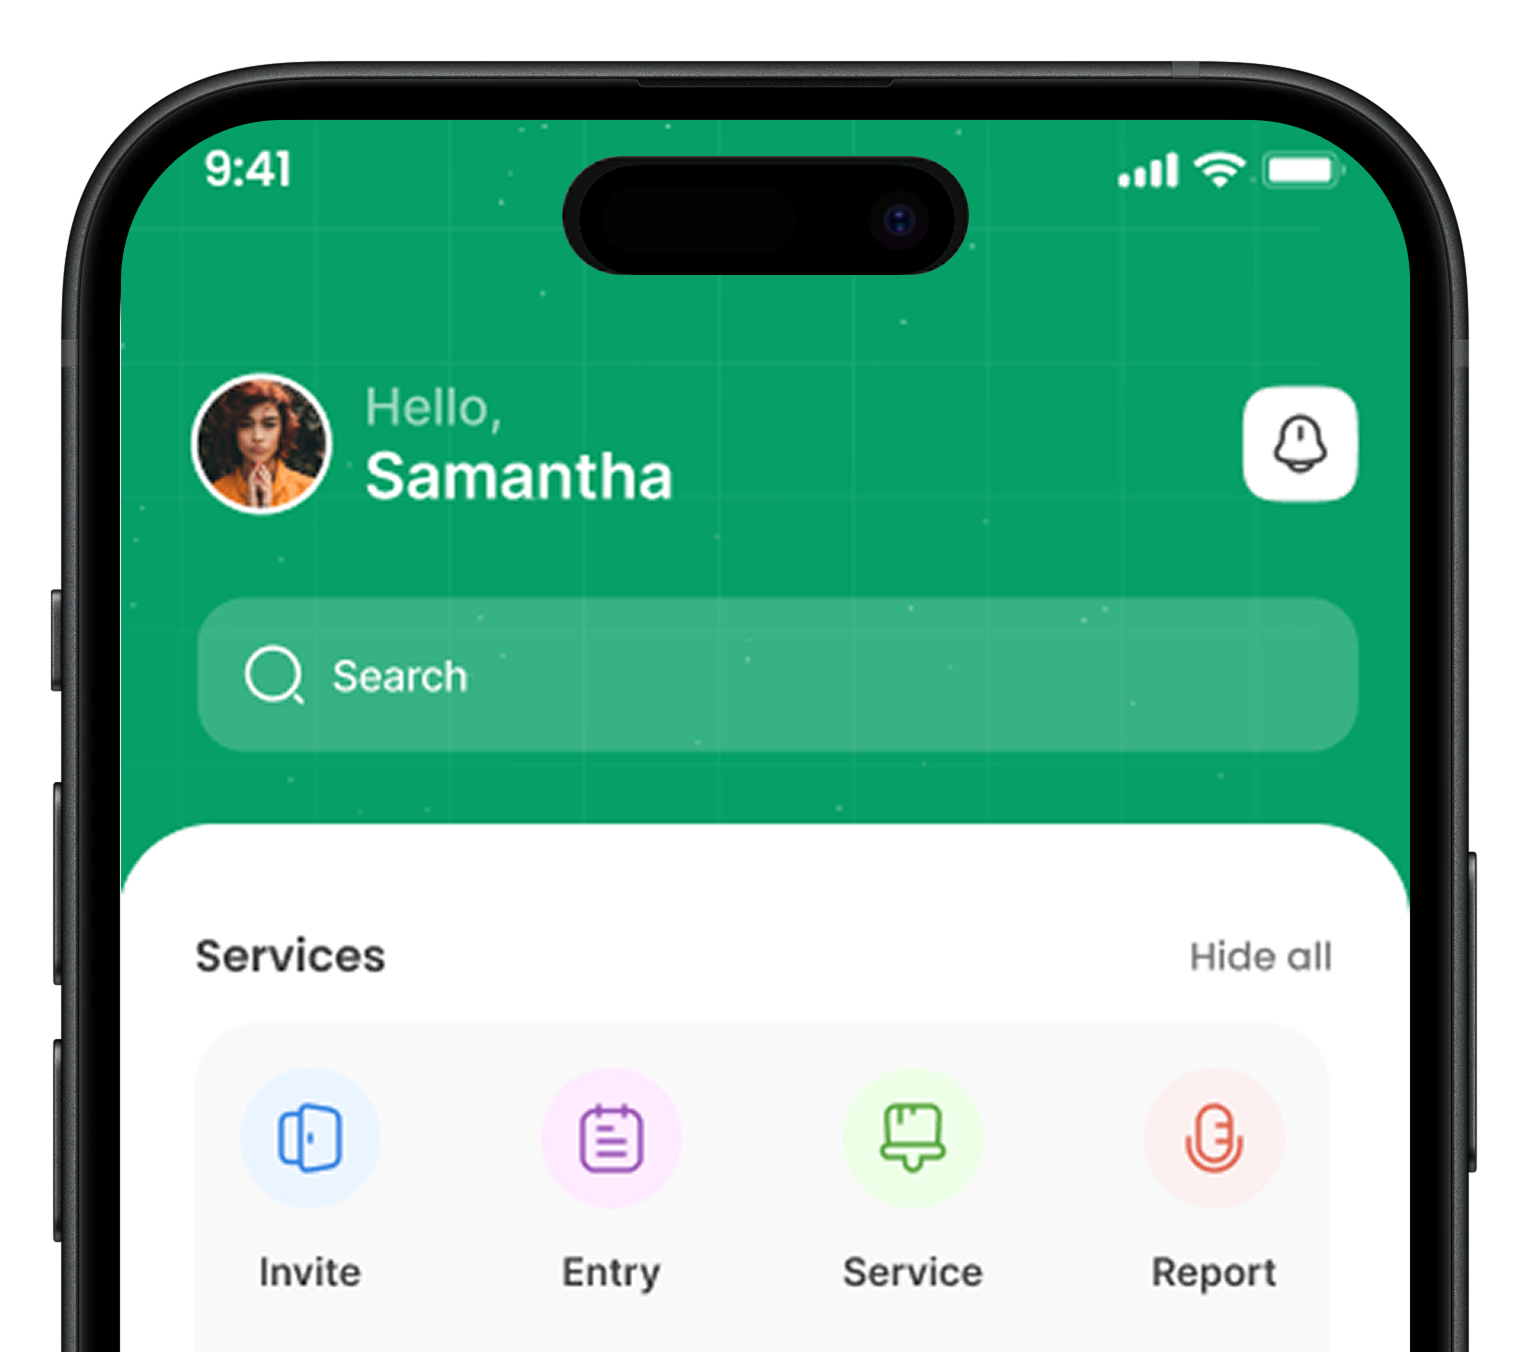
Add Service Contacts (Optional)
Make Help Easily Accessible
Click on Add Service Contacts to add important service contacts like the plumber, electrician, etc. These contacts will be available to all residents for quick access.
Keep Everyone Informed
Ensure all residents can easily reach reliable service professionals without needing to ask around.
Add and Manage Common Vendors
Stay Notified Without Disturbance
Easily add recurring vendors like milkmen, vegetable sellers, and more who frequently visit your community. Once added, residents receive subtle notifications when these vendors check in, helping them stay informed without interruptions.
Simple Vendor Addition
Just enter the vendor’s name, number, and category to add them. Once added, they appear in the community’s common vendor list for everyone to see and connect with.
Instant Access to Vendor Details
Tap on any listed vendor to view their contact info, role, and visit history. You can also enable visitor reminders to get notified when your preferred vendors arrive.
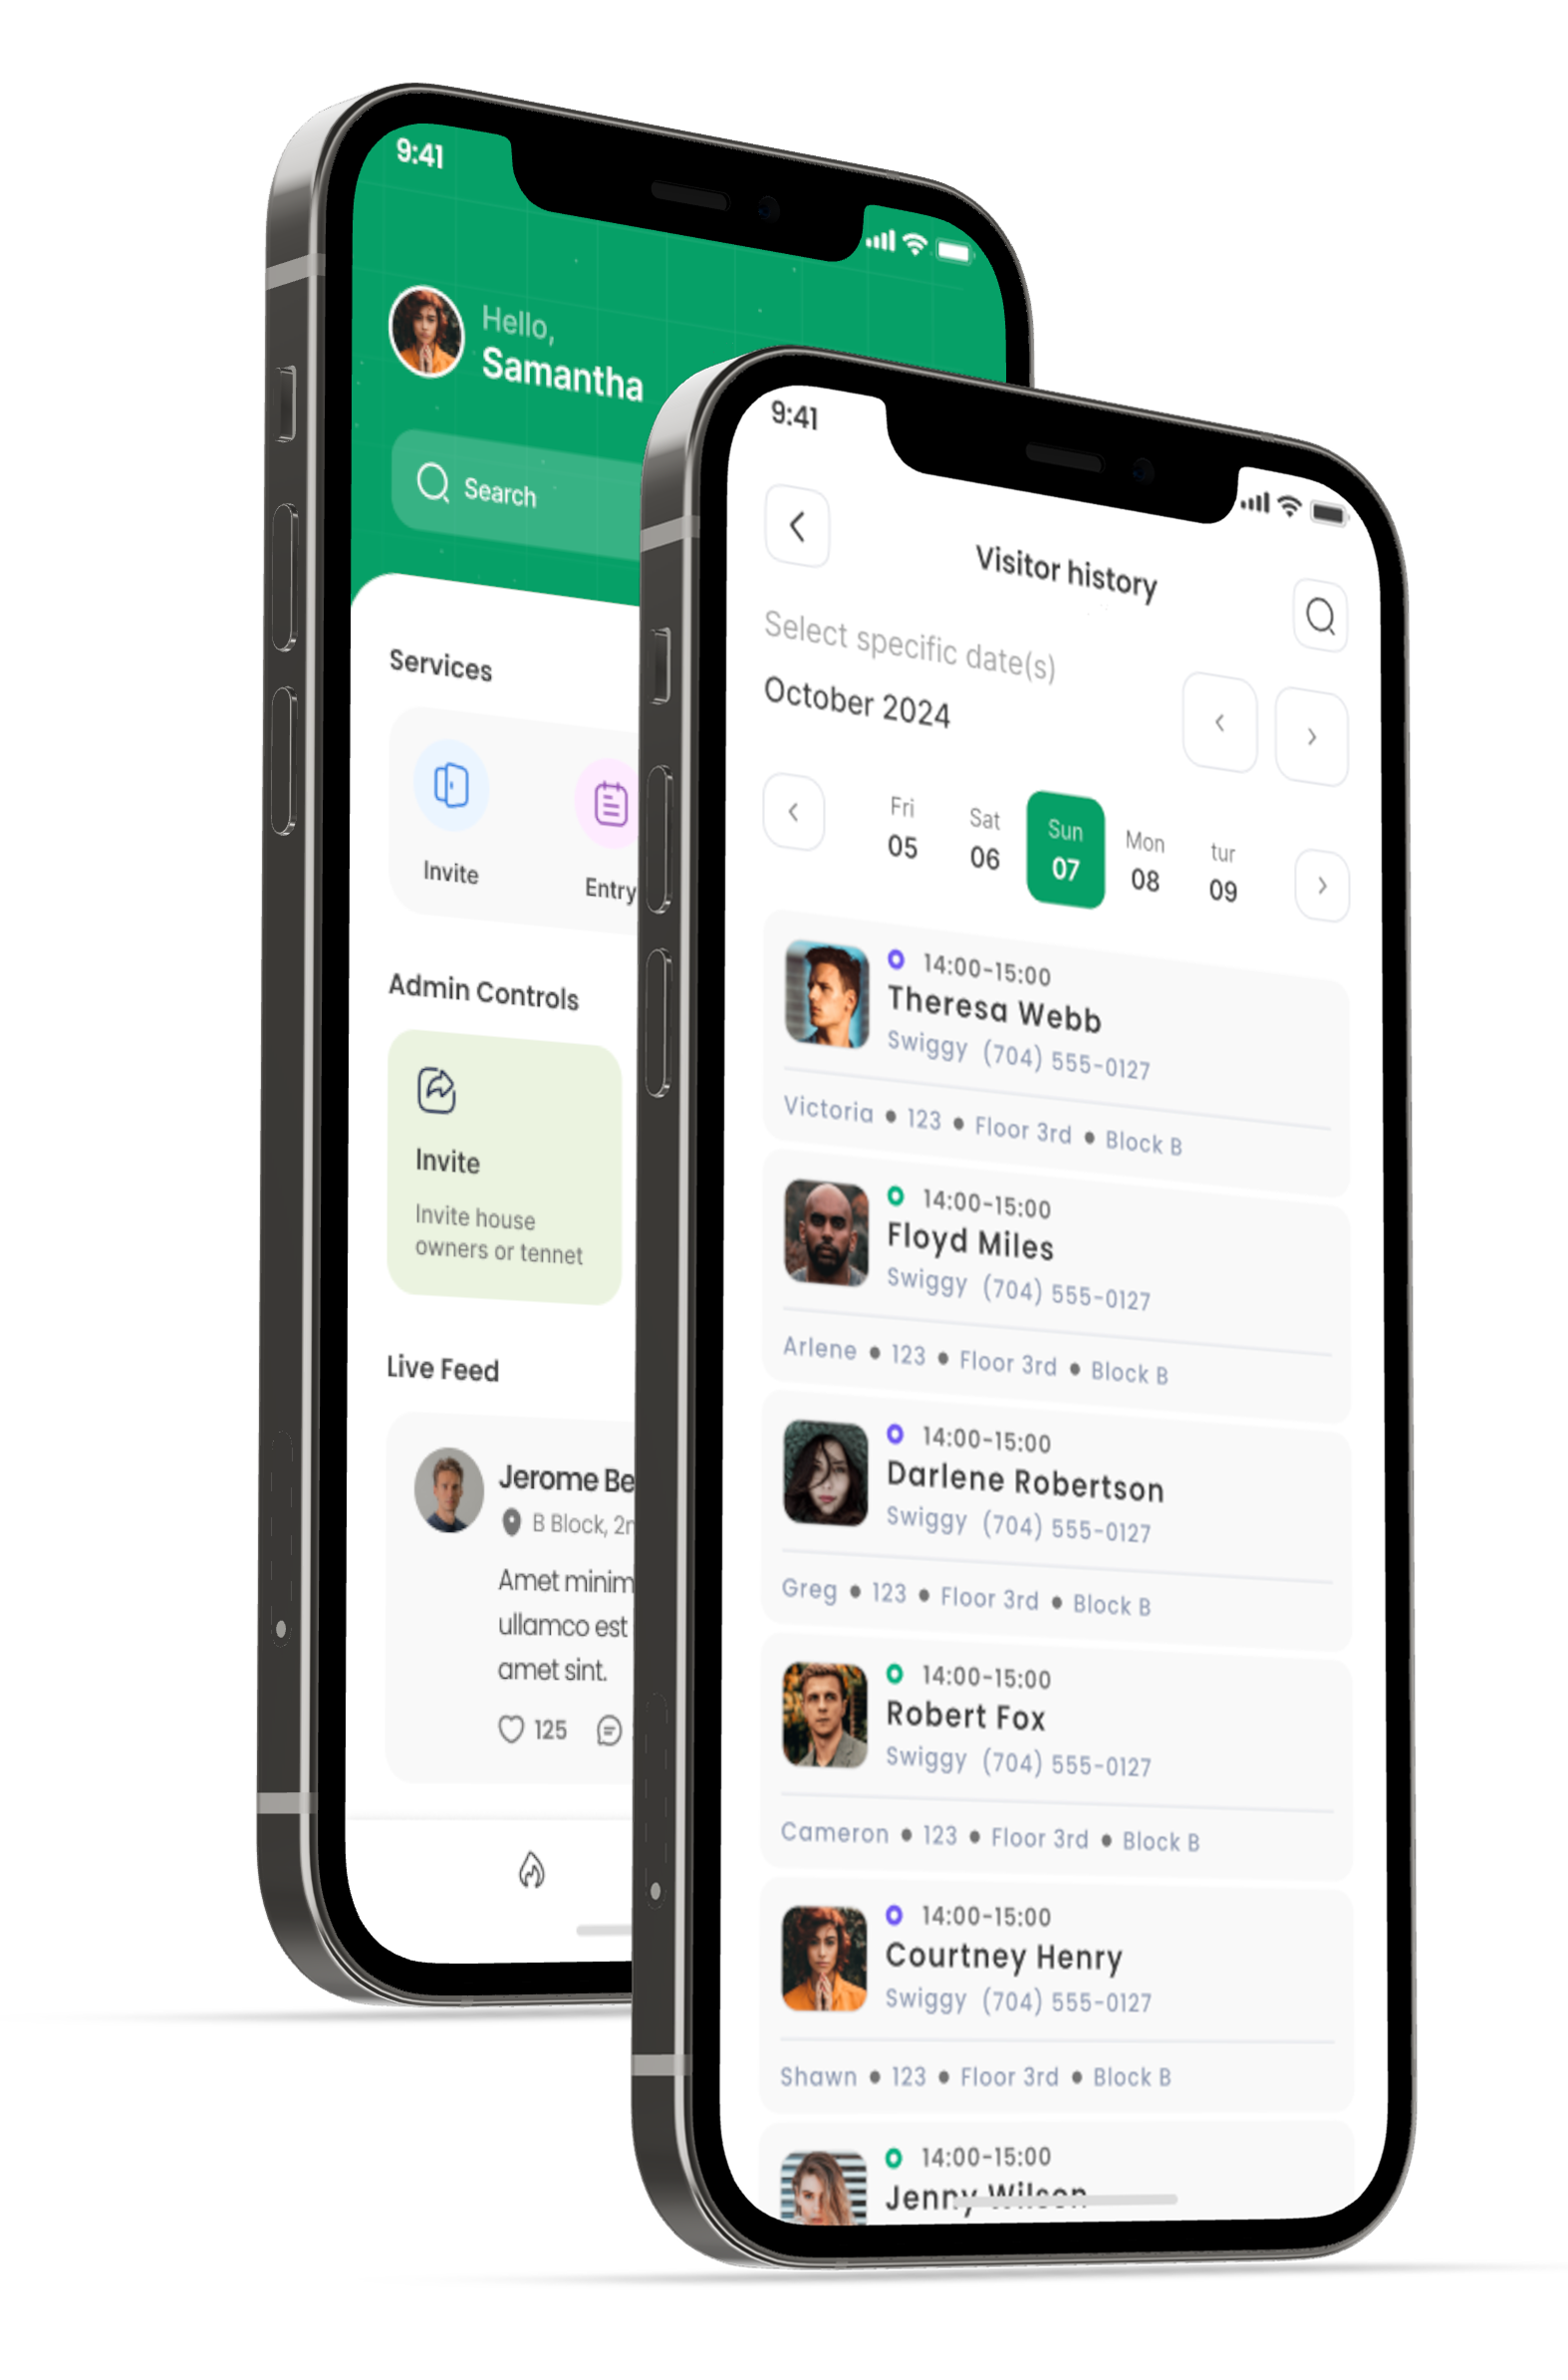
Monitor All Visitor Activity
Centralized Access Log
Admins can view a detailed log of all visitor entries across the entire society, including guest, vendor, and delivery personnel visits.
Detailed Entry Information
Each entry provides timestamped access details with visitor identity, purpose, and corresponding resident, allowing for full transparency and audit control.